Showing posts with label Sewing. Show all posts

Sunday, May 17, 2009

Popping buttons...

I'm still in a quilting funk... :p But I'll be out of it REALLY soon. Promise... Fabrics are washed, ready to be cut, and I've it all planned out... REALLY! :D

See the a new thingy on the right side of this blog? Look now: See the 'My Shop' sign? Yep. I set-up shop on Etsy last night and so far I managed to get some crayon wallets up. hooray!

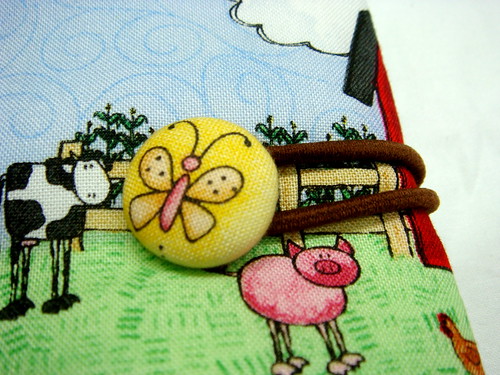
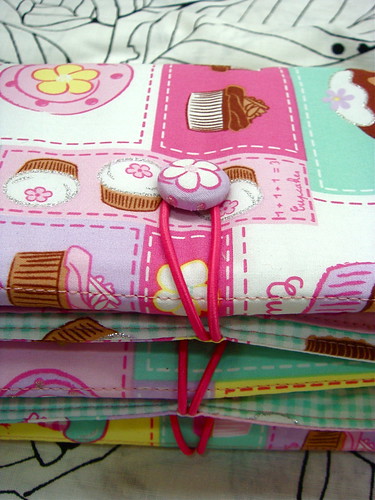
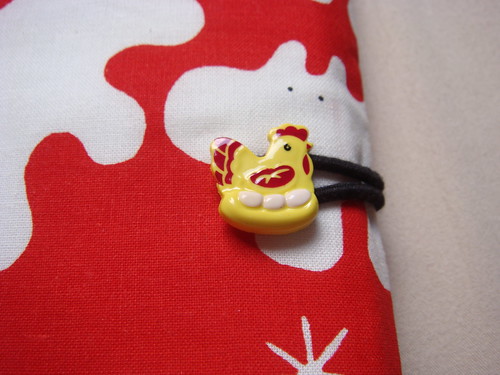
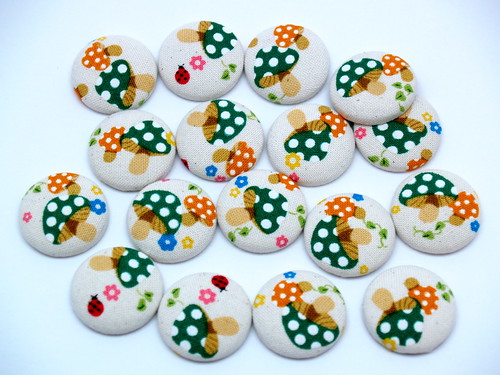
In the mean time, these buttons are all I have to show for. For now.

:: Mushroom madness ::


:: Sweet treats ::


Friday, May 15, 2009

For the boys...

May has a nice sort of buzz. Busy sort of 'buzz'... In the past weeks, we have been blessed with many happy occasions:  birthdays, arrivals of babies, news of soon-to-arrive babies, new opportunities, etc. I don't know, but I felt these personal feel-good events countered the negativities covered in the press: the economy, swine-flu, AWARE tussle, etc... 

Hubby and I also made some plans to move forward with our 'hobby site' which he set-up in the late '90s, servicing the Beanie babies crazed online community. The idea of a 'baby gift ideas site' has been tossed around for the LONGEST time, given that we are such 'big' consumers of baby items/gifts and I felt that the parents in SG are quite shortchanged in terms of cost and variety. More updates about THE PLAN coming up soon, I hope ;> 

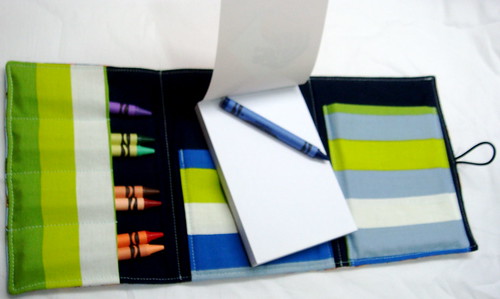
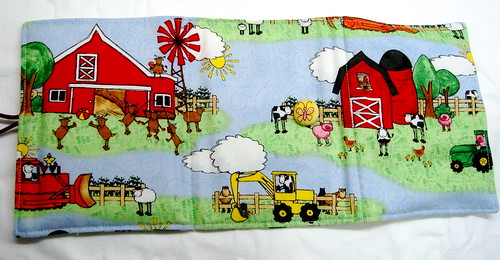
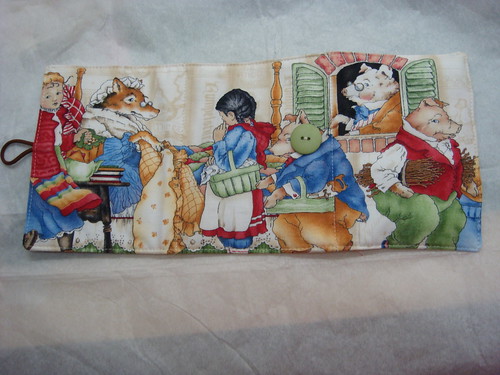
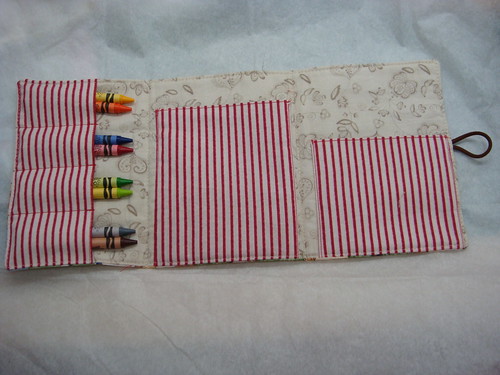
In the mean time, I'm caught in a bit of a 'quilting funk' which I can't seem to shake off. So, I made more of these:


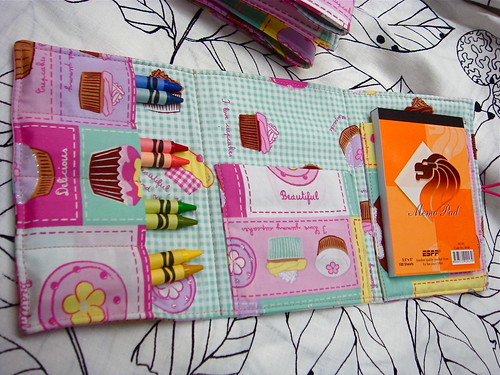
If you are interested in getting one of these fabric wallets for a special little chap, each costs SGD$18 (comes with 8 Crayola non-toxic crayons + 1x100sheet memo pad). Please add $2 if you prefer Crayola non-toxic WASHABLE crayons. 

Wednesday, April 22, 2009

Crayon Wallets for little girls

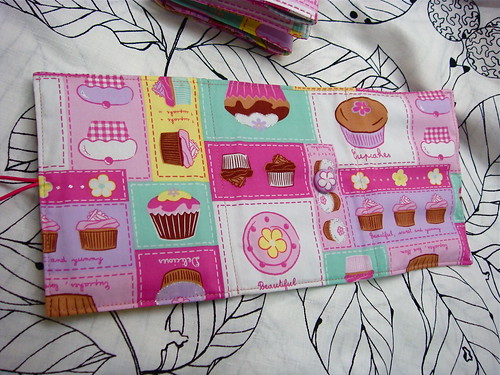
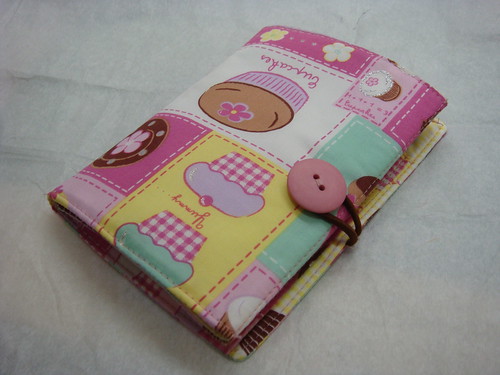
More cupcakes crayon wallets. 

Difference is that I'm getting paid for them now! (cue The Count laugher)

A friend custom-ordered 2 of these crayon wallets and I made one extra with left-over fabrics. 

If you are interested in getting your hands on a fabric wallet, it costs SGD$18.00 (comes with 8 crayons + 1x100-sheet memo pad). Please add $2 if you'd prefer washable crayons. 


Monday, April 13, 2009

It's a wrap!

It's raining babies here! :> Seriously, I have no idea what the government is talking about when they say we are not having enough babies. The gynae's office is always packed, the malls are filled with families with strollers, babies/kids everywhere in the zoo, etc... Then again, I have been visiting 'kiddy-friendly' places hence the observation may be a 'little' skewed :p

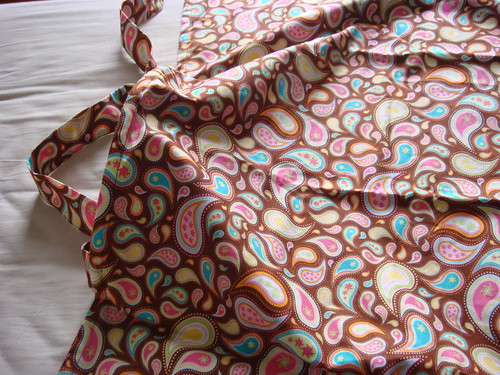
A friend delivered earlier this month and I dugged out my old nursing cover and created a new one based on the pattern. 

It's a double-sided cover, with a flexible boning strip to give you some 'view' to the nursing child. I used the cover as a stroller cover too when the baby's asleep and you want to keep the lights out and curious aunties poking their faces into the stroller :p


The backing is a japanese 100% cotton brown striped fabric which is very soft. 

I think its a great gift: The shops sell them for quite a bit of $$! With a cover, I don't have to wear a nursing top or risk flashing my boobies at anyone! 

Speaking of modesty, we were out at the zoo a couple of weeks back and when I neared the gibbons section, I noticed a yummy-mummy, in a nice denim tube dress, seating at the bench with a fussing baby. What surprised me was that she popped her breast out of the dress, before she positioned her baby to nurse. Hmmmm... Talk about self-confidence! hahaha

Wednesday, March 25, 2009

Book Me

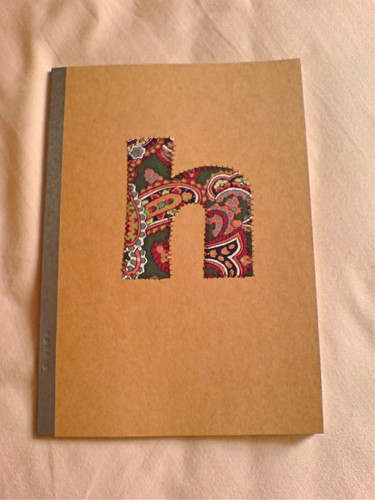
I picked up some notebooks from an old favourite store Muji at Paragon over the weekend. They gave 10% off the stationery supplies. Whoopee!

I'm in a bit of a sewing rut at the moment. Nothing pretty or productive coming out of the machine or cutting table. But good news is that I'm handquilting on an old WIP, sash by sash, cornerstone by cornerstone each evening.

Since the needle in the machine is quite old, I've been sewing some recycled papers together for scribble pads around the house. There's never paper or pen when you need one and when you don't, they are all over the house for your to pack them up.

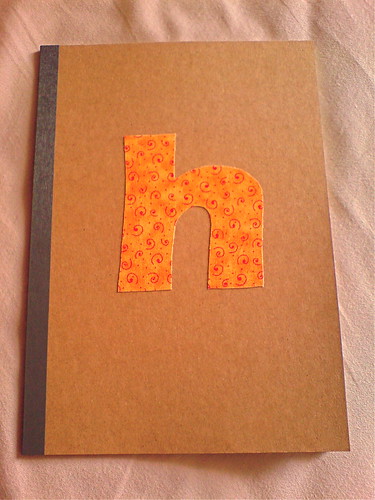
And I jazzed up the notebooks with some iron-on experiments. And I made some for my brother - who knows better than to criticise my workmanship, or lack of. Haha.

This is a simple iron-in. I don't really like how 'bare' it looks - and the edges are not 'pretty' enough.

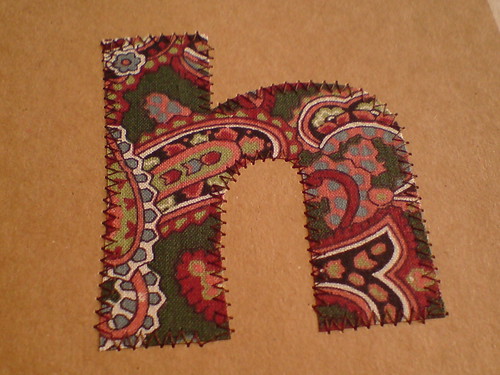
There, much better! I tried another scrap fabric appliqued to the book, using a zig-zag stitch.

Ok... the sewing needs a bit more practice... but overall, I like it :>


Wednesday, February 25, 2009

The T-shirt

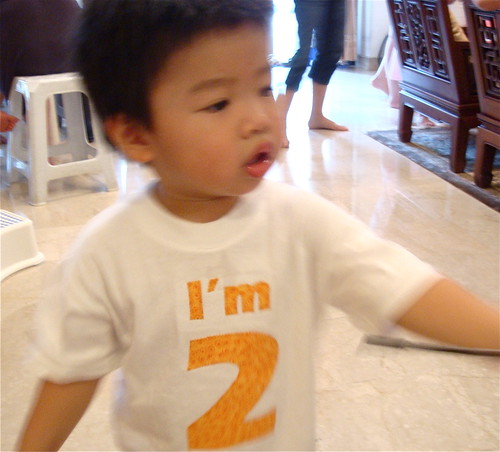
I've been thinking about doing up an appliqued t-shirt for Benji... for a long long time.


Really happy how this turned out - although I'm a still a bit lost about which stabilizer I should use. Here, I used a tear-away for the number '2'. For 'I'm' - I used an iron-on stabilizer which I think its a bit too stiff. I used the iron-on because I was terrified that when I 'tear-away' the stabilizer, it would rip up the t-shirt! Guess I need to experiment a bit more :p

All the Mother-care or Gap clothings that have embroidery or appliques use some kind of iron to protect the threads from chafing the baby's skin. Any ideas what it is and where I can find it?

Tuesday, February 17, 2009

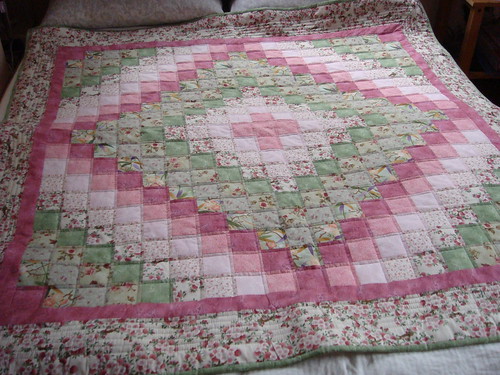
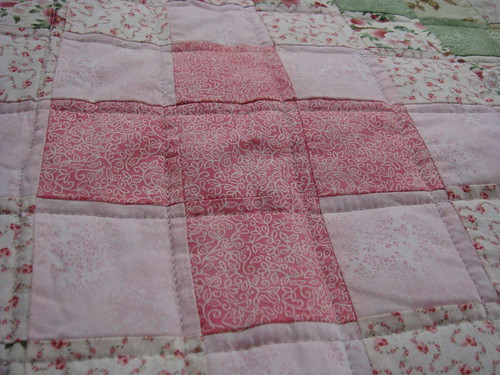
Trip Around The World - DONE DONE

I've been loving this project since Day 1. The top got done quite quick and then I put it away after basting it for quilting. I meant for this project to be my 30th present for myself. But that came and went, and I didn't get it quilted in time.

Over the New Year, my only craft-related resolution was: Finish what I have started, before I start something that I don't finish (quickly) again. So, in the past weeks, I have been doing small projects for the home and for the boy - more about those later on. I've pieced 3 more backings for my completed tops so that I can get them quilted and Done Done sooner.

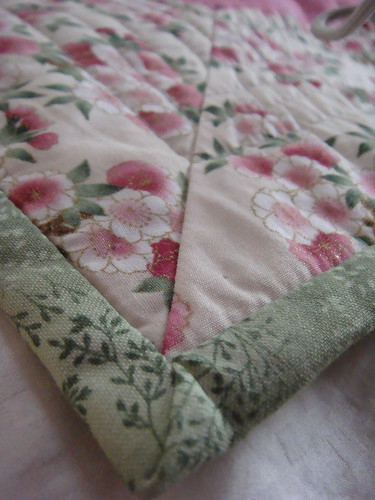
With a good friend's birthday around the corner, I thought I'd gift the TATW to her - as I remembered her liking it when I showed her the WIP. So, it was a few days of intense quilting during Benji's naps & bedtime. Here's the final product! It's a lap-sized square quilt, but it covered just the top of my Queen-size barely.


I simply enjoyed putting the binding on and handsewing the back down - I was like: Done already?! . Never mind that the mitered border & the mitered binding don't match much, it's still my pride and joy :>


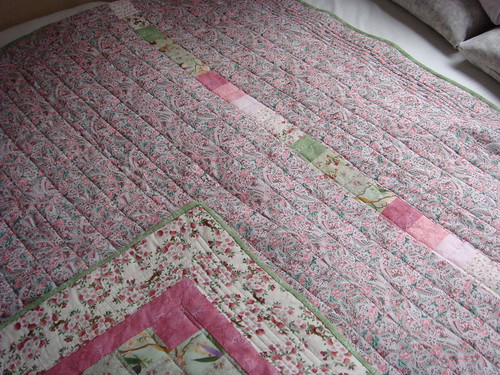
I quilted in straight lines with the walking foot - even then my lines are not all that straight!

Here's how the back of the quilt looks like. LOVE IT.

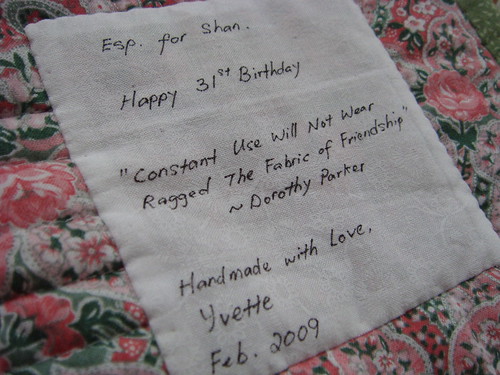
For the label, I grabbed a verse from Dorothy Parker - how apt for a quilty gift for a friend! :>

Wednesday, February 11, 2009

Full Circle

Yes, yet another new toy :> I've been collecting all these 'sewing toys' like how we are collecting Thomas train sets for Benji :p I HEART my sewing toys ;>

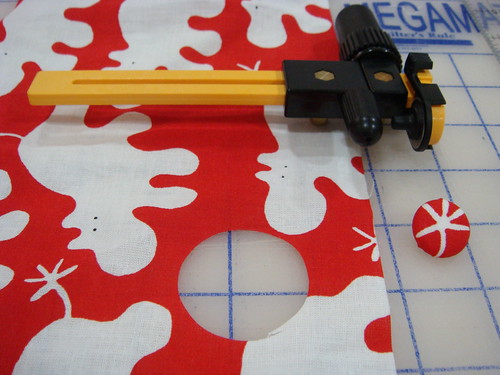
Here's a 'must have' tool for cutting circles! It's the Olfa rotary circle cutter which I bought at Popular Bookstore during their year end sale.


This circle was cut WITHOUT any stabilizer, freezer paper, etc. It just works! I used it for the self covering button bought at Spotlight many moons back.

I'm already planning another project cutting up circles from my scraps for a home decor project. Hopefully I'll get to that soon! :>

Monday, January 19, 2009

Denyse Schmidt - Mix-it-up coasters

One of my favourite crafty books is this one. It inspires me a lot, in terms of colours, designs, etc. More of all, it shows me that sewing/quilting should be done YOUR WAY. No quilt police to tell you that your sewing must be 100% accurate, that your colours must consist of this & that, that your blocks must be true & true traditional, etc. The quilts are very different from the ones I see displayed at the quilt shops/workshops. DS' quilts are so refreshing & modern and I simply want to try each and every one of them.

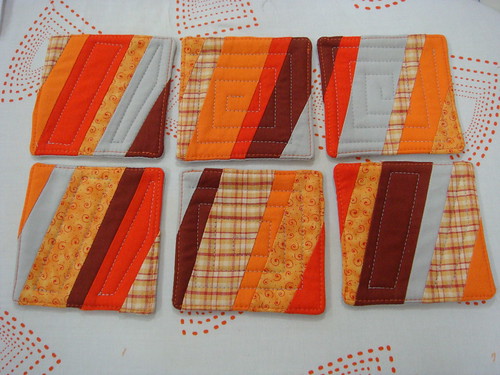
After many months of book-ownership, DS flickr-group browsing, I finally decided to create something out of her book for a friend's new home. COASTERS! I know, I know. It's nothing challenging or great as a quilt or some of her other quirky project, but this gal gotta start somewhere, okie? ;>

Well, looking at the book, I thought: geez, I can make these coasters in 15 mins. I was SOOOOOO wrong. I ended up slaving away the entire evening over this set of 6 coasters.

Step 1: Enlarge pattern design
Step 2: Roughly cut up the pieces from the pattern sheet
Step 3: Stick each piece on a plastic template sheet & trim
Step 4: Punch out the points where the 1/4" seam lines intersects on all sides of the templates (6 pcs)
Step 5: Pick out 6 different fabrics
Step 6: Cut out fabric rectangles & stack them
Step 7: Trace pattern (mark out the 1/4" points too) on the top piece of fabric with water soluble pen & then cut them out. I rotary cut the 6 layers of fabrics.
Step 8: Switch the pieces around to make sure each top will have a different combination of fabrics.
Step 9: Match points, pin, sew, iron, repeat again & again & again...
Step 10: Square up

That's just for making the coaster tops. When I finally made them into cushy coasters and quilted them, it was just sooooo sooooo satisfying. Overall, the coasters are just nice for the couple's new home, which has a comfy basement/entertainment room, with orange walls, some nice grey tiles... I picked the fabrics with their colourways in mind... And I think my friend appreciates them, so I'm happy. :>


Okay, another house-warming coming up next week. More coasters??? :>
1st post of 2009!

It's been a LONG while! Well, it had been a busy Christmas, my hubby & I worked through the New Year and now we having the Lunar New Year coming up next Monday! Gosh... I need a holiday from all the holidays!

Found time to start a new project at the beginning of the year, though. More updates when it gets closer to a better shape to be shown! :D And I also indulged a 'little' online retail therapy, which arrived last week!

Over the Christmas period, I managed to sew up a few made-with-love (read: wonky sewing) items for some special people.

Remember the cupcakes fabrics? I made the crayon wallet for a friend's little girl since it was such a big hit with Benji :> I LOVE LOVE LOVE how sweet this wallet turned out.


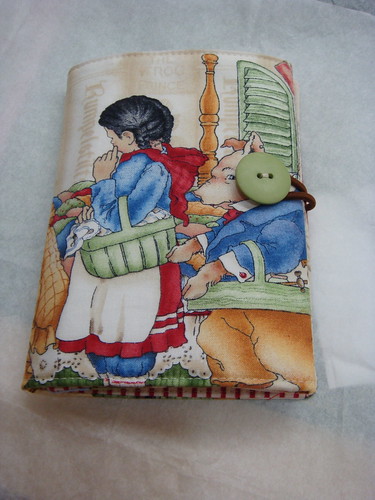
For another creative little 3 YO, I made the crayon wallet with the scraps from Gram's Fairy Tale baby quilt and it turned out perfect (in my opinion! :p)


I believe I will continue to make more of these wallets for more of our little friends! :>
Friday, December 19, 2008

Good Buys 2

December has been a month of crafty indulgence for me :>
Well, I haven't given into temptations YET with all the online fabric stores' sales & coupons. But I have been checking out the local crafting supplies stores, stocking up on notions and what-nots.

A couple of weeks ago, I visited a local store in Chinatown. They sell loads & loads & loads of Clover products that made me a very very very happy girl :>

Here's what I bought finally, and I did show some restraints when I returned a few items at the cashier before I checked out the items :p

1) The mesh transfer sheet - handy for transferring quilting patterns without cutting out template sheets.
2) Bias Tape Maker - you need one for each size!
3) Gauge - which came in very useful when I had to fold over 1/8 seams in my last project. But this gauge is in metric, so I had to measure it against my other imperial rulers first.
4) Water soluble marker - gosh, this works like a charm for me! Why I didn't get this much earlier is beyond me. LOVE IT! The marks wash out beautifully and most importantly, the marking is much more accurate and clear.
5) Iron-on transfer-pencil - I love the idea that I can trace out a pattern with this pencil and then transfer it to the fabrics just by simply ironing on it. Downside is that the markings will be permanent. No immediate plans/projects that call for this pencil yet. :p
6) Fabric glue stick - this will be useful for the applique works
7) Variegated thread - too pretty to be left out of the shopping basket ;>
8) Heat & Bond No Sew fusible web - I was thinking of making some 'iron-ons' for friends who don't sew. This is perfect for such 'painless' projects.

I do consider myself somewhat of a 'gadget-girl' (I love gadgets, but I don't go queueing up for iPhones just to be the first ones to get it...), and perhaps that explains why I fell in love with sewing again, after all these years. All the toys that you can buy for just marking patterns! For cutting fabrics! And once, I spent an entire day just search and surfing for various presser feets and their functions... And of course, the Internet has also made researching much easier and interesting, bringing me all the inspiring blogs of people who share their love & passion for their crafts.

Alrighty. Time to get back to work now and earn more $$ for my crafty fund (and Benji's diapers :p) ! ;>

Tuesday, December 16, 2008

Fabric Gift Wrapping 2

Here's a package of booky-goodies going to a friend in New York. Her family has moved from Singapore for almost a year now, and we bought some Chinese books for their 3 little ones, sort of like helping them to get in touch with their 'Asian Roots', so to speak :>

This came from Ikea's 'mini-bolt' which I love to buy. I used another one when I used fabrics to wrap a gift for another crafty mama's baby party.


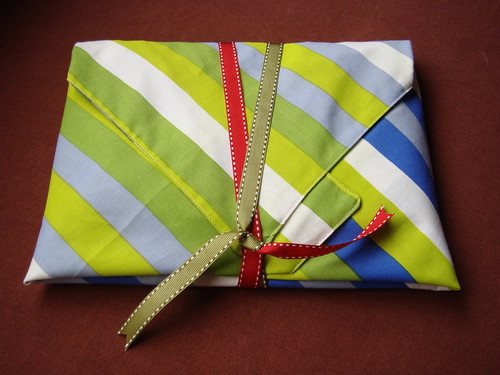
This fabric wrap is a little more 'structured'. I based it loosely on a pattern in this book and while I don't have linen & silk, I do have loads of Ikea's cotton fabrics ;> The length of the ribbon is much shorter though, but given the thickness of these ribbons, I don't wish to add too much bulk to this parcel. Keeping it S I M P L E and S H O R T.

9 more days to Christmas! :>

Thursday, December 11, 2008

Cupcakes, anyone?

Now, who can resist a Spotlight sale? 20% percent off... I've expected the shop to be a scene of madness again, especially when it was the Hari Raya Haji holiday last Monday. While I was there for the buttons (for projects that I can only reveal after Christmas), I caved in and bought some poplin fabrics and felt too. The solids bundled on the right were picked up from Golden Dragon earlier in the day :p


Yummy...

Christmas Skirting the issue

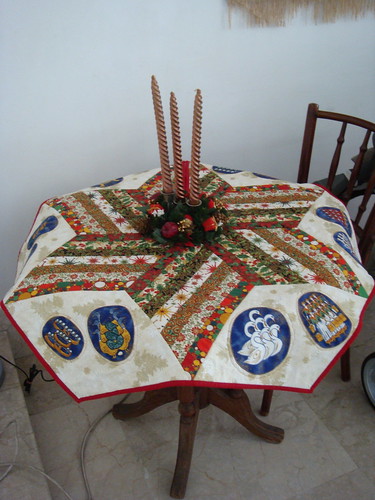
The Christmas Skirt is officially off the tree this year.

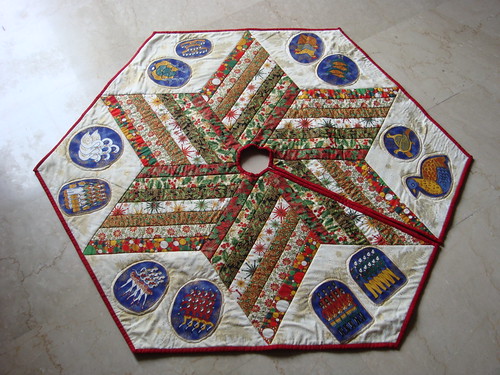
Here's a quick look at the 'finished product'. Nope. It's not been washed yet - I'm terrified of the colours running (I didn't pre-wash the fabrics for this project)... but let me figure out a way to get this in the wash without too much drama later on.


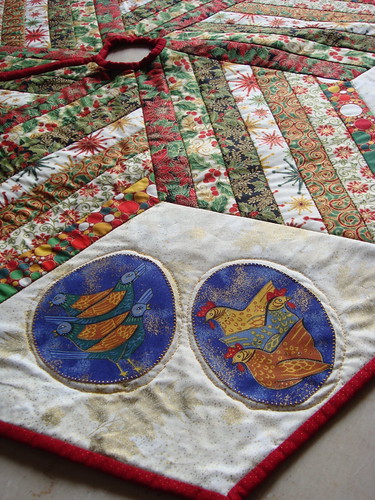
Applique close-up. Featuring the 12 gifts for the 12 days of Christmas.

The tree would have been PERFECT with this skirt under it. But, its not meant to be, for this year, at least. :p

So, we have 'relocated' the skirt to adorn the old-style coffeeshop table and placed the candlestickholder/wreath over the centre to cover the hole. Perfecto!

It's starting to feel a lot more like Christmas now! :>

Tuesday, December 9, 2008

My Christmas 'mini-Skirt'


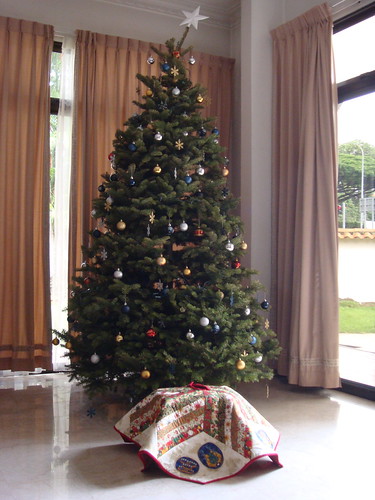
AND THEN... I realised it was too SMALL for our tall tree! :( What a HUGE disappointment!

I should have at least measured the size of the tree stand when I started on this project, but I didn't. I'm so disappointed with this, and I even contemplated running out to buy a baby tree so I can dress it up with the skirt. But what am I going to do with 2 trees in the house? :(

So, I'm going to think up a way to use this skirt then... More pictures later.


I've been busy sewing up coasters for our Christmas dinner this year. And the cat is enjoying all the activity because she has a nice warm board to cosy up to after I'm done with it. :p


Let me go have a think about the Skirt now... headache, heartache! :(

Saturday, November 29, 2008

Benji's ca-yon wallet

Benji started to make a grab for our pens and pencils many months ago. So, we've invested in washable crayons for him to go crazy with. But he is limited to colouring only when we are at home, and at his little table, because we are so paranoid about losing the crayons in our bags and creating a mess, etc.

I chanced upon Jennifer's blog and she had created a crayon wallet tutorial - on sale at her Etsy store. It's great! Now, I can carry a scribble pad along with Benji's crayons, and it comes with a pocket to keep his masterpieces too :p

I used up some Ikea 'mini-bolts' left over from my quilted table toppers - more about that in a bit - they are not expensive and allow me to work on 'test-projects' :>

I've had these little chicky buttons for the longest time. I don't have a large button collection, and with projects like these, its a good excuse to go shopping now! ;>

I tried fitting in Benji's LARGE crayons but they were a little too tall for this wallet. The size is just right for the regular sized ones. But I've already 'discoloured' the wallet and side of the pad. But no worries, I expect this wallet to be filled with crayon bits and streaks sooner or later anyway ;>

The pad was supposed to fit the pocket on the right side. But I did not check if I had the pad that was the size of the pocket dictated in the pattern. But fortunately, the center pocket could fit the note pad (I had tons of these left from a fund raising event) well.

Overall, I'm very happy with how this turned out. I've bought Jennifer's other pattern for her quilted list-taker. Looking forward to see how that will turn out! :>

Monday, November 10, 2008

12 Days of X'mas - Tree Skirt

I've been complaining A LOT these days that the malls are putting up X'mas decor earlier each year.

On the other hand, I've been keeping my eyes open for X'mas gifts, planning schedules around the holidays and also keeping a list of things that I will need to do, clean, craft in time for X'mas. The X'mas tree skirt pattern caught my eye when I was at the local quilt shop. I attended a couple of sessions at Quilts and Sew Forth and this is what I have done up so far! :>


The creases you see are due to the folding and packing. I chose 7 different X'masy fabrics and a lovely beige/gold background fabric. I chose to cut out the 12 days of X'mas gifts from a panel for the applique, instead of tracing, and hand appliqueing other designs from scratch to the tree skirt. I simply used some Heat & Bond and machine sewed them with a blanket stitch. Quick & Easy! :>


The skirt is now basted and I will machine quilt this baby after I have joined the blocks for Benji's Zoo quilt. I'm looking forward to this skirt gracing our X'mas tree this year :>


Sashiko Coasters

Finally got round to completing the set of 5 coasters after choosing the backing fabric. Although the Sashiko coaster kit just require you to sew up the sides without any batting or backing, I chose to add on a lightweight iron on interface and a backing fabric.

I chose a dark Japanese print Kaufman fabric (almost black) with Kanji prints on it. I feel that it brings out the Japanese-ness of the Sashiko stitching.

I'm looking forward to completing the rest of the Sashiko kits!

A couple of busy months...

It has been a while since my last entry. And this blog, quilting, fabrics and sewing have been consistently on my mind! There have been several knitting projects completed (not photographed yet), many yards of fabrics bought (I can't even begin to keep track of them!) and many projects stated (I need to tweak the WIP column very soon!).

Last week, I found a really neat shop, Sin Hin Chuan Kee, along North Bridge Road. It's a traditional wholesaler shop (read: old and not great with displays) that packs lots and lots of goodies at great prices. I found Chaco paper for tracing Sashiko patterns, elastic threads, tweezers (for getting paper backing out from appliques), and there are a whole of goodies in the store! I bought 2 reels of ribbons at just about US$1.90 each for X'mas crafting too.


I was packing up my stack of WIP the other night, then I saw my Zoo blocks looking so cheery and bright... and neglected. I remembered planning for the borders to be a deep shade of red. What a perfect X'mas gift for Benji! And I started to get into the swing of things (if I leave it till 'later' again, I will not get it done!), and started tracing the fabrics, cutting them, and taped up my layout mat on the wall. I'm now sewing the rows together, then will put up the borders hopefully by end of this week! Yippee!

Monday, September 8, 2008

Fabric Gift-wrap

Last Sunday, we celebrated a crafty friend's baby girl's 3rd birthday. I decided to use the remnants of my Ikea 'mini-bolt' to wrap up this gift, so that the mummy can have some fun making her little girl stuffs too!

1) The present was first wrapped up with kraft paper first. Then I was deciding if I should use safety pins to pin the folds in place or fabric glue, or a ribbon to tie it all up?! Then DH had a brilliant idea for my to sew everything in place!

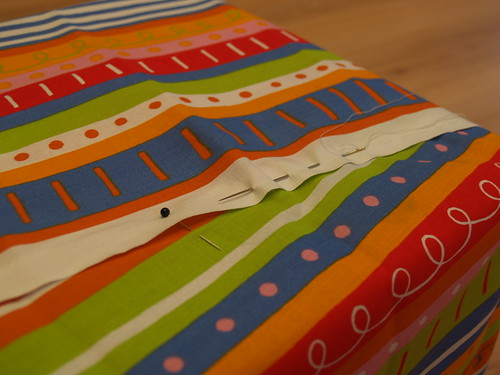
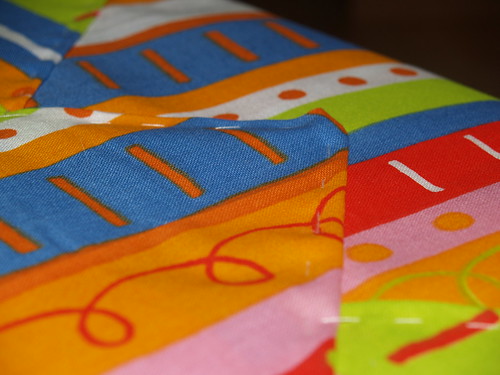
2) So, I 'wrapped' up the present as you would with your gift wrap paper. And pin and pin and pin the fabric into position.

3) Using a darning needle or similar, run your stitches along the edge of your fabric. Make sure you catch the bottom fabric! This is where the initial brown paper comes into play. The brown paper prevents 'injury' to the box when I stabbed too hard through the fabrics, etc.

As for the thread, I just use a single strand of polyester-cotton thread to sew this baby. No need to use strong threads as I wanted the gift recipient to be able to rip out the threads easily, and not damage the fabric!

You can consider the stitches to be almost like 'basting stitches', instead of real quilty stitches ;>

Lastly, I pinned a gift tag to the present with a curved safety pin. Sorry, no pic here. Did it on the fly just as the gang was at the door waiting to go for the party! :>